Windrose's crafting system is deep but punishing. Spend resources on the wrong things and you'll waste hours farming materials that could have been avoided.
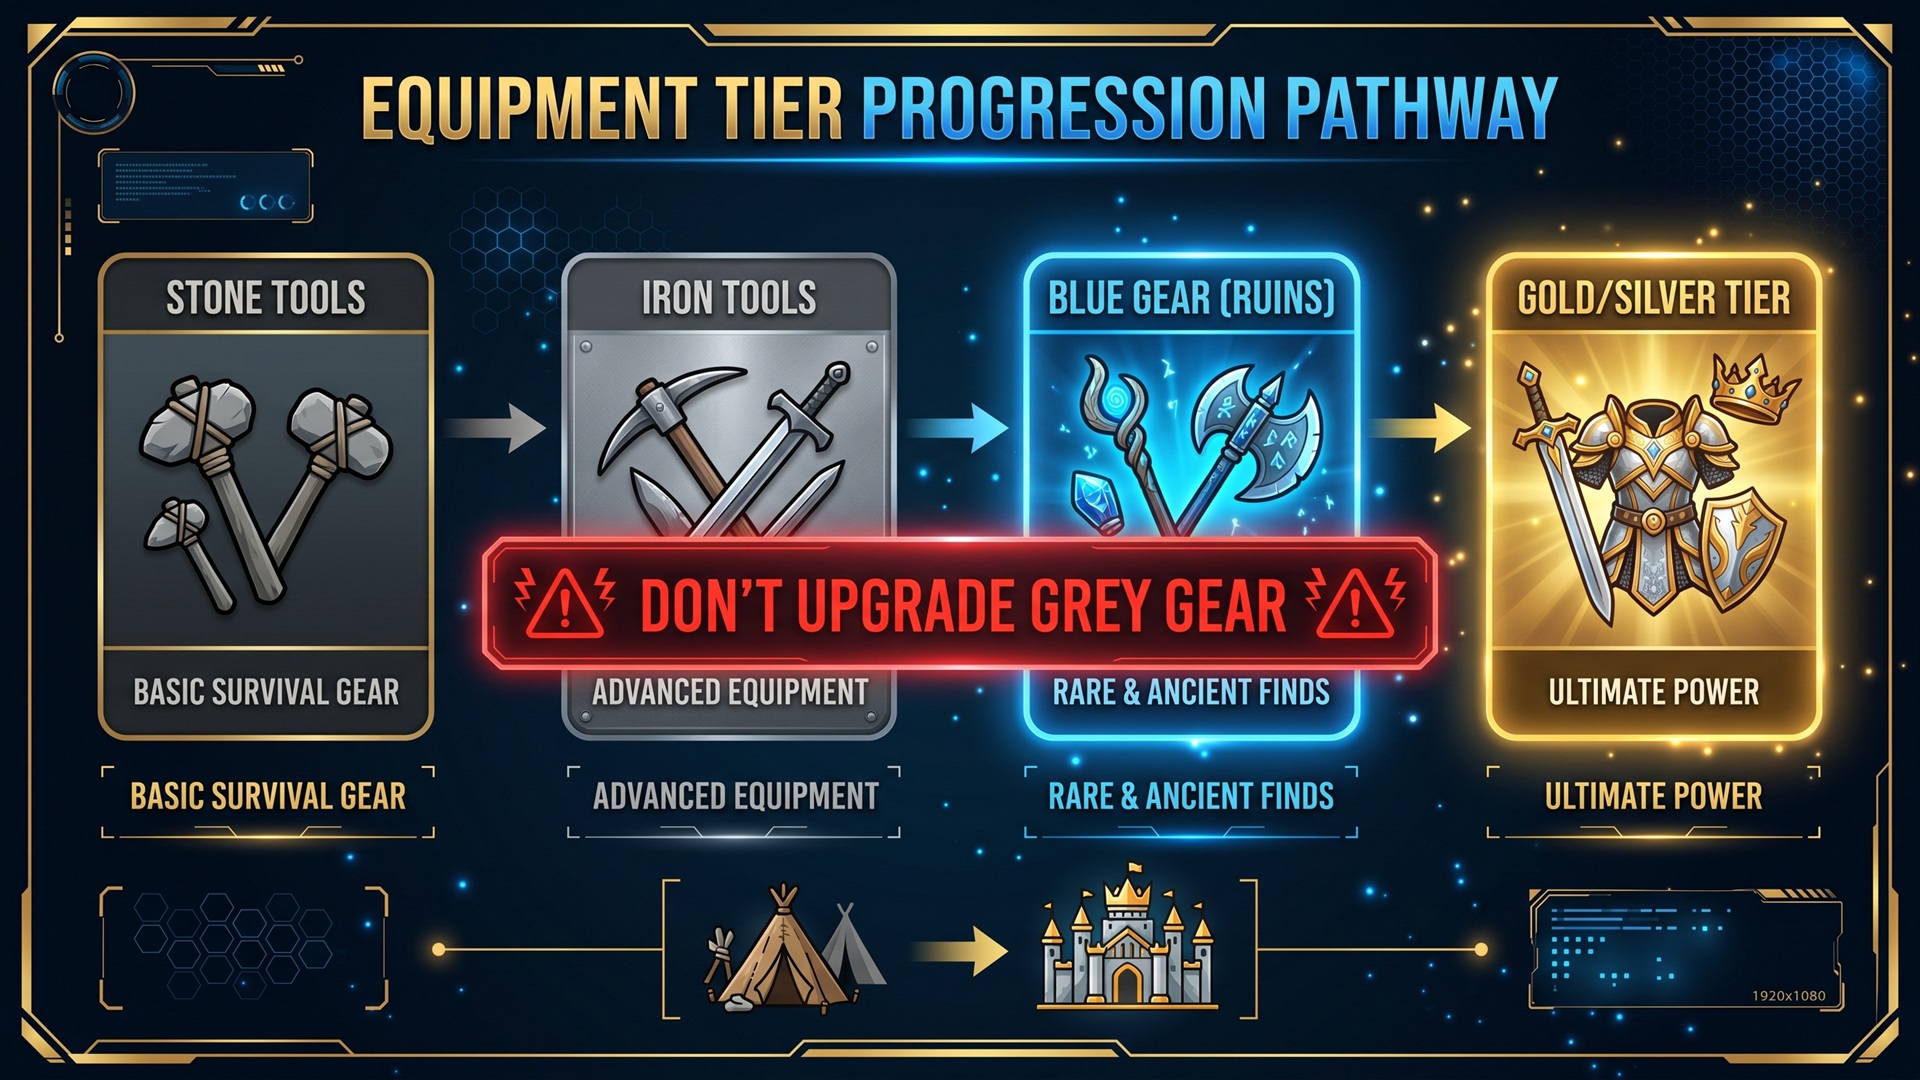
1. The #1 Rule: Never Upgrade Grey Gear
Grey (basic) gear is a trap. You don't get upgrade materials back when disassembling. Every upgrade spent on grey gear is permanently lost. Save your materials for blue-tier (rare) gear found in ruins and dungeons. Blue gear has better base stats and scaling.
2. First Crafting Priority
- Torn Sailcloth Bag (2 Coarse Fabric + 1 Rope) — your inventory is tiny without it
- Stone Pickaxe — unlocks mining
- Iron Pickaxe — unlocks silver and gold nodes (major upgrade)
- Workbench — unlocks advanced recipes
- Forge — metal smelting and weapon crafting
3. Tools Before Weapons
Upgrade your tools before your weapons. An iron pickaxe unlocks silver and gold resource nodes, which in turn unlock better weapons and armor. A better weapon helps you kill faster — but better tools help you progress faster. Tools win early game.
4. Material Farming Routes
- Wood: Chop trees anywhere. Prioritize oak trees for higher-quality timber.
- Stone: Beach cliffs and rocky outcroppings. Use pickaxe.
- Clay: Dark muddy patches inland (not beaches). Mark these on your map.
- Copper: Green-tinted rocks in the starting area. Mark every node.
- Iron: Grey rocks in Foothills region (unlocked after first boss).
- Silver/Gold: Require iron pickaxe. Found in caves and mountain areas.
5. Gear Progression Path
Stone tools → Iron tools → Blue gear from ruins → Upgrade blue gear → Silver/Gold tier
Skipping grey gear upgrades entirely saves you dozens of farming runs. Be patient, explore ruins for blueprints, and invest only in gear that will last.